Sourdough bread (Pane toscano a lievitazione naturale)
This is the Tuscan style sourdough bread I make at home. To make this bread I don’t use baker’s yeast (also know as compressed yeast), but I use natural leaven. It’s the way people used to make bread for centuries, before baker’s yeast was invented. Those who are familiar with making sourdough bread, know very well the exceptional quality of this type of bread and once you start making bread with this method; there’s no way back! Natural leaven is a huge topic, so huge that it would be impossible to talk extensively about it, here, just now. The purpose of this recipe is to show how to make bread with natural leaven, not to show how to create a starter-culture. However, if you are intrigued by this topic and you want to know more, here I have some key words for you, that you can search in internet:Natural leavenBread starter cultureSourdough starterSourdough breadIf that is not enough and you are really desperate for extra advice, then you can contact me (Federico) directly through the “contact us” form you can find in the Italyum website; I will be more than happy to answer your questions.In Italy, the natural leaven is called “lievito naturale” or “lievito madre” (the mother) and it is regularly used by the Italian artisan bakeries to make large regional breads like toscano and pugliese for example. Lievito naturale has a stiff consistency; this is particular to Italy as generally the majority of starters are of loose consistency, like a batter (or similar to a poolish consistency, for those who are familiar with bread making terminology).I have created this recipe because during the daily routine of refreshing/feeding the lievito naturale, you only take a small part of it (from the previous day feed) and mix it with fresh flour and water. The remaining lievito naturale is usually wasted in the bin, because otherwise you would end up with several kilos of lievito naturale, which is unpractical unless you want to make bread on an industrial scale. I was fed up with all this wastage, so I have found a way to utilise the remaining lievito naturale to make this simple bread, which is made with only two ingredients (water and flour), because the leaven is already made with only water and flour.Now, coming back to the pane toscano, what you need to know is that in Tuscany they do not use salt when making bread. It’s weird, I know, but once you get use to it, you will love it! Apparently the choice of not using salt is because their food is already rich in salt; think about the salty cured meat they have in that region or the salty Pecorino cheese or the Caciucco fish stew and the no-salt stand will make sense!Let’s see how to make it...........Before you start, be sure you also have a baking stone, a bread proving basket (1 Kg capacity) and a bread/pizza peel for domestic ovens. The bread proving basket will need a handful of rye/wholewheat flour and the bread/pizza peel will need a handful of coarse semolina (read the recipe directions and you will see why).
Ingredients
- 450 grams (1 lb) Canadian strong white bread flour (12.6 % protein content) bp 90% if you cannot find the Canadian strong white flour specified above, look for any strong white bread flour with protein content between 12.5% and 14%. If the protein content of your flour is closer to 14% than to 12.5%, then I suggest you use 15 g (1tbs) of extra water.
- 50 grams (2 oz) Spelt flour bp 10%
- 100 grams (4 oz) Natural leaven (through the recipe I will call it lievito naturale) bp 20%
- 350 grams (1/2 pint + 3 fl oz) Water (cold) bp 70%
Instructions
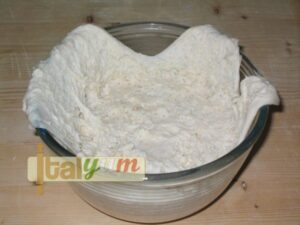
- First, we lift/remove the top crust that has formed on the outer side of the lievito naturale. The crust is made by dry matter and could contain impurities, so it is not of any use. What we need is the core of the lievito naturale.
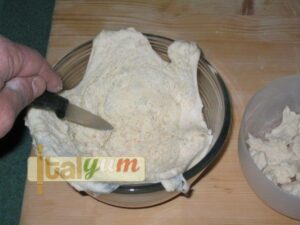
- With a small knife, we cut out some of the lievito naturale; for this recipe we need just 100 g (4 oz) of it.
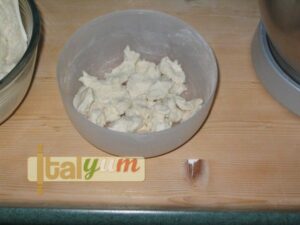
- Break the 100 g of lievito naturale is small bits.
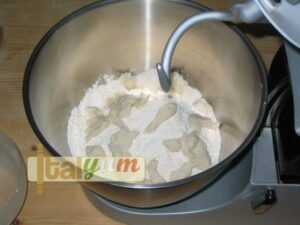
- Add the two types of flour into the bowl of your mixer (I have used a Kenwood mixer). Then, add the lievito naturale bits to the flour.
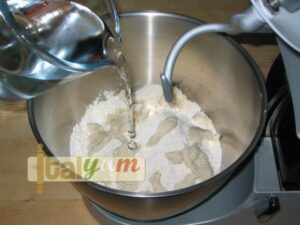
- Add all the water.
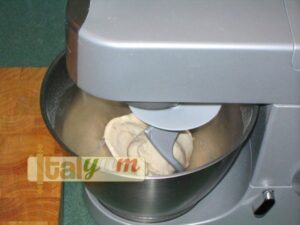
- Mix for 2 minutes at first speed and 6 minutes at second speed.
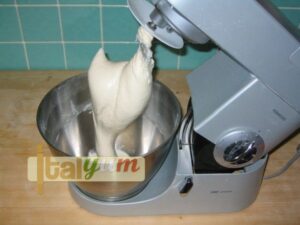
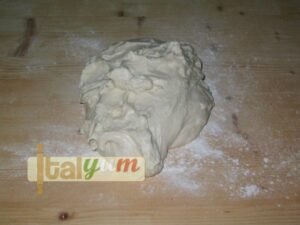
- Here is the dough once the mixing has been completed.
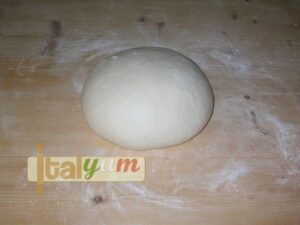
- Put the dough onto a lightly floured working surface.
- Make a ball out of your dough.
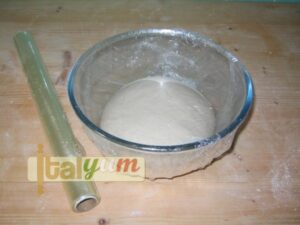
- Put the ball into a large bowl (preferably a glass bowl; don’t use metal) and leave for 12 hours at about 10°C (50°F). The reason of this low temperature is because we need to slow down the fermentation. I left my bowl in the conservatory, over night, because I live in Scoltland and at this time of the year (April 2012) it is still cold outside. If you live in a hot country or you are making this bread in summer time, then I suggest you put the bowl in the fridge. I usually put the bowl in the conservatory at 9 PM and take it, to proceed with the recipe, at 9AM the day after.
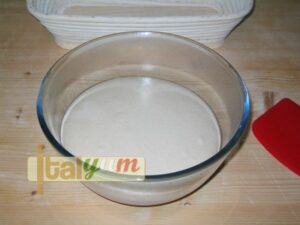
- Here is the dough at 9AM, the day after. As you can see, the dough has not raised too much because we have slowed the fermentation down during the night. If you have left the dough outside the fridge during the 12 hours slow fermentation stage, then go straight to the next step. If your dough has been kept in the fridge, then leave it for a couple of hours at room temperature before to proceed with the next step.
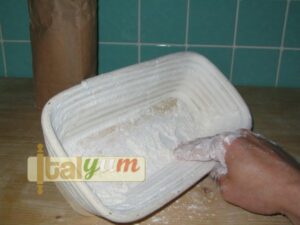
- This proving basket is called “cane banneton”. Spread and pat some flour (use rye or wholewheat flour for this job) all over its wall and bottom, so that the flour fills the gaps between the canes. Be generous with the flour otherwise the dough will stick to the basket, compromising the final result.
- After 12 hours slow fermentation, put the dough onto a lightly floured working surface.

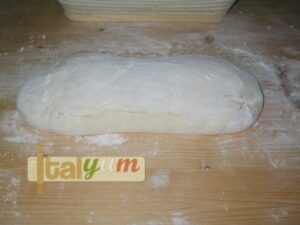
- Form an oval loaf. There’s a specific technique to do this and I suggest you check YouTube, searching for “shaping a batard”. The picture shows my loaf will the smooth side up.

- Now, I have turned the loaf upside down, with the seam (let’s call it the ugly side) facing upwards.
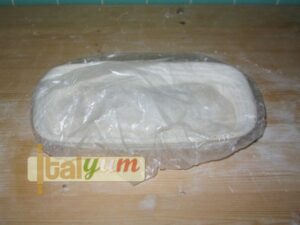
- Lift your loaf and put it inside the proving basket, with the ugly side up. Cover the basket with a plastic bag and be sure that the plastic bag is not touching the dough. Leave to dough to rise for 4-5 hours at room temperature. If your lievito naturale is vigorous, then the dough should nearly double in size.
- One hour before the baking, place the baking stone inside the oven and switch the oven on. Set the oven to 230°C (450°F). About 10 minutes before putting the bread into the oven, we need to create some steam inside the oven. I personally spray the water (4 or 5 times) against the oven wall, but if you are concerned about this method because you may damage your oven fan or electrics in general, here is another method: at the very start, when you switch the oven on, leave a small metal tray in the bottom of the oven. About 10 minutes before putting the bread into the oven, throw 2 or 3 ice cubes over the little tray and close the oven door quickly.

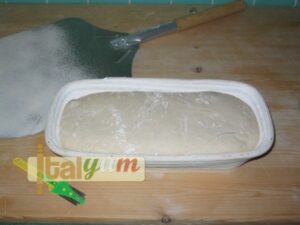
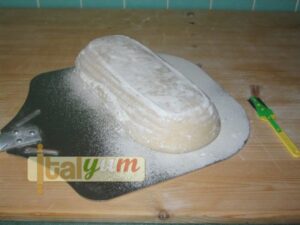
- The picture shows my loaf after 4 hours raising at room temperature.
- Spread some semolina or polenta flour onto the peel and carefully turn the proving basket over the peel. Your loaf should fall out of the basket and over the peel, with the nice side up.
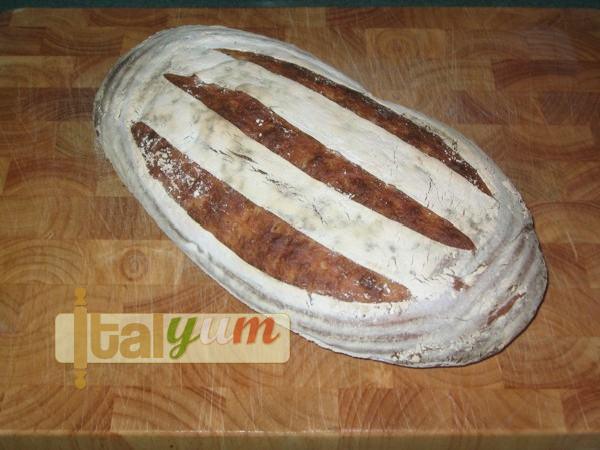
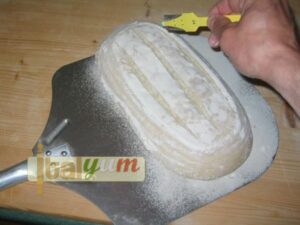
- With a grignette or a razor-blade (don’t use an ordinary kitchen knife) slash the loaf as shown in the picture. Three longitudinal slashes, with a steady hand, will do the job.
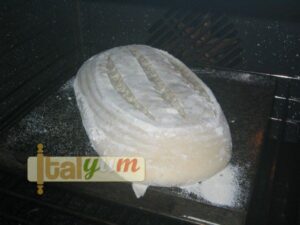
- Place the loaf into the oven. At this stage I usually spray the oven walls with another 3 or 4 sprays and quickly close the oven door. If you are using the metal tray method, to generate steam, then add a couple of ice cubes. Bake your loaf for 40-45 minutes.
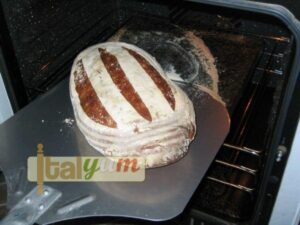
- This is the bread ready, after 45 minutes (I like my bread well fired!).
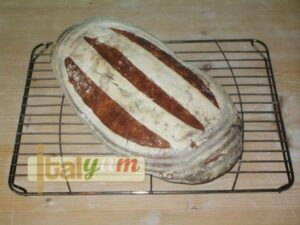
- Leave the bread to cool down over a wire rack for at least a couple of hours.
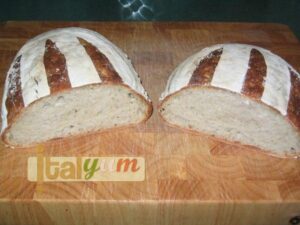
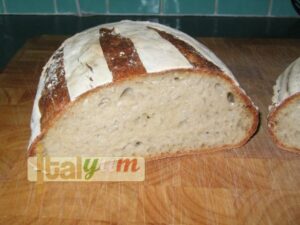
- Then, you can cut your loaf and do whatever you want with it.
- Here is a final picture of my Tuscan style sourdough bread.
Notes
Buon appetito!
Federico Pezzaioli
Nutrition
Calories: 350kcal
Tried this recipe?Let us know how it was!